How to Use a Camping Coffee Percolator to Brew Camp Coffee Perfectly
Want to make great coffee outdoors? A camping coffee percolator can help. It’s perfect for brewing delicious coffee under the stars. Learn how to use one and elevate your camping experience.
Percolator coffee isn’t just about caffeine. It’s a ritual that creates rich, flavorful cups in nature. This guide covers everything from choosing grounds to perfecting your technique.

Ready to start your percolator journey? Visit My Shop for top camping coffee gear. Make your outdoor coffee dreams come true.
Table of Contents
Key Takeaways
- Choose the right coffee grind size for your percolator
- Measure coffee grounds accurately for optimal flavor
- Master the water-to-coffee ratio for your preferred strength
- Learn proper percolator assembly and cleaning techniques
- Experiment with brewing times to perfect your outdoor coffee
- Consider different percolator materials for durability and heat retention
- Explore alternative uses for your camping percolator
Understanding Camping Coffee Percolators – Brewing Method
Camping coffee percolators are perfect for outdoor coffee lovers. They come in various sizes and styles for your camping trips. Let’s explore their key components, types, and benefits.
Parts of a Camping Percolator
A typical camp percolator has several essential parts:
- Coffee pot: The main container that holds water and brewed coffee
- Percolator basket: Where you place the coffee grounds
- Stem: Connects the basket to the pot’s base
- Spreader: Distributes water evenly over the grounds
- Lid: Covers the pot and often has a clear knob for monitoring the brew
Types of Percolators Available
You’ll find two main types of camping percolators:
- Stovetop percolators: Ideal for use on camp stoves or grills
- Campfire percolators: Designed to withstand direct flame exposure
Both types often feature durable construction. Stainless steel percolators are popular for their toughness and heat retention.
Benefits of Percolator Coffee While Camping
Using a camp percolator offers several advantages:
| Benefit | Description |
|---|---|
| Strong flavor | Percolator coffee is brewed multiple times, resulting in a bolder taste |
| Large capacity | Many models brew up to 12 cups, perfect for group camping |
| Durability | Stainless steel construction withstands outdoor conditions |
| Versatility | Can be used with various heat sources, including campfires |
Want to upgrade your camping coffee game? Check out My Shop for the perfect camp percolator. Your next outdoor adventure awaits!
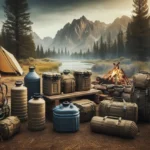
Essential Equipment and Supplies Needed
The right gear is vital for brewing coffee while camping. Let’s look at the must-have items for perfect outdoor coffee.
Choosing the Right Coffee Grounds
Use coarse ground coffee for percolators. This size allows for optimal extraction without over-brewing. Pre-ground coffee is handy for camping trips.
For the freshest flavor, grind beans just before brewing.
Water Requirements and Quality
Water quality greatly affects your coffee’s taste. Use clean, filtered water when you can. For stronger coffee, use 2 tablespoons of grounds per 8 ounces of water.
Additional Tools and Accessories
Enhance your camping coffee experience with these tools:
- Coffee filter for a cleaner cup
- Measuring scale for precise brewing
- Timer to track brewing time
- Portable stove (like Jetboil) for heating water
- Durable camp mug

Different brewing methods need varying prep times. Here’s a comparison of popular camping coffee techniques:
| Brewing Method | Preparation Time |
|---|---|
| Instant Coffee | 30 seconds – 1 minute |
| AeroPress | 3 minutes |
| French Press | 4 minutes |
| Pour-Over | 6 minutes |
| Percolator | 6 minutes |
Find a wide range of camping coffee gear at My Shop. With the right supplies, you’ll enjoy great coffee outdoors.
How Do Camping Coffee Pots Work
Camping coffee pots, or percolators, brew coffee using a unique method. They extract rich flavors from coffee grounds through percolation. This process begins by adding water to the pot’s base and grounds to the basket.

As water heats, it rises through a stem into the brew basket. Hot water then drips over the coffee grounds, starting extraction. This cycle repeats, creating a strong, hot brew.
Perfect percolator coffee requires careful temperature control and timing. Over-extraction leads to bitter coffee if it’s too hot or long. Use a coarse grind and watch the process closely for ideal results.
“The magic of camp coffee lies in the rhythm of the percolator and the aroma that fills the air.”
Different heat sources affect brewing methods. Place your percolator above flames or on coals when using a campfire. For camp stoves, ensure the burner fits under the pot’s base.
The GSI Outdoors Glacier Percolator works well on various heat sources. My Shop offers a wide selection of camping coffee equipment for outdoor enthusiasts.
Choosing the Right Camping Percolator
The right camping percolator can make your outdoor coffee experience amazing. Let’s look at key factors for picking your ideal brew companion.
Material Considerations
Your percolator’s material affects durability and taste. Stainless steel offers excellent durability and even heat distribution. Enamel brings nostalgic charm but may chip over time.
Aluminum options are lightweight and budget-friendly. However, they are less durable than other materials.
| Material | Pros | Cons |
|---|---|---|
| Stainless Steel | Durable, Even heating | Heavier |
| Enamel | Classic look, Good heat retention | Can chip, Stains easily |
| Aluminum | Lightweight, Affordable | Prone to dents, Less durable |
Size and Capacity Options
Percolator capacity ranges from 3 to 28 cups. Solo campers might prefer a 3-cup model. Groups may need a 9-cup or larger percolator.
The GSI Outdoors Glacier Stainless Steel Camping Percolator offers sizes from 3 to 12 cups. This range caters to various group sizes.

Features to Look For
Look for percolators with heat-resistant handles for safe use. A clear PercView knob helps monitor brew strength. Durable construction ensures long-lasting performance.
The Coletti Butte Stainless Steel Camping Percolator has a heavy-gauge build. It also comes with a lifetime replacement guarantee, perfect for rugged adventures.
Ready to brew like a pro on your next outdoor trip? Check out our top-notch camping percolators selection!
Preparing Your Coffee Grounds

Great camp coffee starts with proper measurements. For a 9-cup COLETTI percolator, use one tablespoon of coffee per cup of water. Adjust this ratio to suit your taste preferences.
Freshly ground beans offer superior flavor, but pre-ground coffee is more convenient for camping. If using whole beans, grind them coarsely for a forgiving brewing process.
Instant coffee brands like Alpine Start and Mt. Hagen are lightweight options ideal for backpacking. Coffee-in-a-bag from Steeped or Chamberlain Coffee offers a taste closer to regular coffee.
| Brewing Method | Coffee-to-Water Ratio | Brew Time |
|---|---|---|
| Percolator | 1 tbsp per cup | 7-10 minutes |
| Pour-over | 2 tbsp per cup | 2-3 minutes |
| Aeropress | 1.5 tbsp per cup | 1-2 minutes |
For the freshest taste, bring a portable grinder like the GSI Ultralight Java Drip. This lets you grind beans at the campsite. The key is balancing convenience and flavor.
Ready to boost your camping coffee experience? Check out My Shop for quality percolators and coffee gear. Your outdoor adventures deserve great coffee!
Setting Up Your Percolator
Mastering percolator assembly is crucial for great camp coffee. Let’s explore how to set up your camping percolator. This will help you brew the perfect cup.
Water-to-Coffee Ratio
Use 1 tablespoon of coffee grounds per 6 ounces of water. For a 9-cup COLETTI percolator, you’ll need about 9 tablespoons of coffee. This ratio creates a balanced brew.
Feel free to adjust the ratio to suit your taste preferences. Experimentation can lead to your ideal cup of coffee.
Proper Assembly Steps
First, fill the percolator with water using the level markings. Then, place the stem and basket into the pot. Add your coffee grounds to the basket, distributing them evenly.
Lastly, attach the spreader and lid. This completes the assembly process for your percolator.

Filter Options and Usage
Coffee filters can enhance your brew, though they’re not always necessary. Paper filters in the basket can reduce cholesterol in your coffee. For a cleaner cup, place a filter in the basket before adding grounds.
| Brewing Time | Coffee Strength | Grind Size |
|---|---|---|
| 7 minutes | Well-balanced | Medium-coarse |
| 10 minutes | Strong, potentially bitter | Coarse |
Coarsely ground coffee allows for longer brewing without bitterness. For best results, use a medium roast bean with a medium-coarse grind. Happy percolating!
For top-quality camping percolators and accessories, check out My Shop.
Brewing Process Over Different Heat Sources
Camping coffee brewing requires understanding various heat sources. Campfire and camp stove methods each need specific techniques. Let’s explore how to make the perfect cup in the great outdoors.
Campfire Brewing Techniques
Campfire coffee adds rustic charm to your outdoor adventure. Place your percolator on a grill grate above the flames. Keep the fire steady for consistent heat.
Be careful not to overheat, as it can make your coffee bitter. Adjust the grate height to control temperature.
Camp Stove Methods
Camp stoves offer better temperature control. Set your stove to medium heat and place the percolator on the burner. This method allows for easy adjustments to avoid over-extraction.
Temperature Control Tips
Heat control is key for tasty coffee. Aim for water temperature between 200-205°F for best results. If your coffee tastes bitter, lower the heat.
For weak coffee, increase the heat slightly. Keep practicing to find your perfect brew.
| Brewing Method | Heat Source | Temperature Range | Brewing Time |
|---|---|---|---|
| Campfire Coffee | Open Flame | Varies (200-212°F) | 6-8 minutes |
| Camp Stove Brewing | Portable Stove | 200-205°F | 5-7 minutes |
Find more camping coffee gear and tips at My Shop. We have everything you need for outdoor brewing adventures.
Timing and Monitoring Your Brew
Perfecting percolation time is crucial for great camp coffee. Brewing usually takes 7-10 minutes. Adjust this time to get your desired strength.
The transparent perk knob helps monitor your brew. Watch the color change from clear to rich brown. This shows coffee strength without lifting the lid.
Use 1 tablespoon of grounds per 6 ounces of water. This ratio ensures consistent results every time.
Personal taste influences brew time. Some prefer 10-15 minutes for strong flavor. Others like 5-7 minutes for a milder taste. Experiment to find your perfect balance.
For quality percolators that make monitoring easy, visit My Shop. We offer a variety of options.
FAQ:
For “How to Use a Camping Coffee Percolator to Brew Camp Coffee Perfectly”
Q: How do you use a camping percolator?
A: To use a camping coffee percolator, start by filling the percolator pot with cold water. Then, place coarsely ground coffee in the filter basket. Assemble the percolator, place it on your heat source, and let it brew until you see the coffee bubbling in the glass knob on top. Remove from heat, let it settle for a few minutes, and enjoy your fresh cup of coffee.
Q: What’s the best grind size for coffee in a percolator?
A: The best grind size for coffee in a percolator is coarse. This prevents coffee grounds from seeping through the filter basket and into your cup. A coarse grind also helps avoid over-extraction and bitterness, which can happen with finer grinds in a percolator.
Q: How long should you let coffee percolate when camping?
A: The ideal percolation time for camping coffee is about 7-10 minutes. Start timing once you see the coffee bubbling in the glass knob on top of the percolator. Be careful not to over-percolate, as this can lead to bitter coffee. Remove the percolator from heat once the desired strength is reached.
Q: What’s the best camping percolator for making the best coffee?
A: The best camping percolator is typically a durable stainless steel coffee percolator. Look for models with a sturdy construction, good heat distribution, and a clear glass knob for monitoring the brewing process. Brands like GSI Outdoors, Coleman, and Stanley offer reliable options for camping enthusiasts.
Q: How do you clean your camping coffee percolator?
A: To clean your camping coffee percolator, first disassemble all parts. Rinse with hot water to remove coffee residue. For a deeper clean, use a mild dish soap and a soft brush to scrub the interior. Pay special attention to the filter basket and stem. Rinse thoroughly and dry completely before storing to prevent rust, especially for stainless steel percolators.
Q: How much coffee should you use in a percolator?
A: The amount of coffee grounds to use in a percolator depends on your taste preferences and the size of your pot. A general rule is to use about 1 tablespoon of coarsely ground coffee per cup of water. Adjust this ratio to make your coffee stronger or weaker. Remember that percolator coffee is typically stronger than drip coffee maker brews.
Q: What are the advantages of using a coffee percolator for camping?
A: Using a coffee percolator for camping offers several advantages. It’s a durable and simple brewing method that doesn’t require electricity. Percolators can brew large quantities of hot coffee, perfect for group camping trips. They also produce a rich, full-bodied coffee that stays hot in the percolator, ideal for chilly mornings outdoors.
Q: How do you know when percolator coffee is ready?
A: You’ll know your percolator coffee is ready when the bubbling in the glass knob at the top of the percolator slows down and the color of the coffee in the knob becomes darker. This usually takes about 7-10 minutes. The aroma will also become stronger as the coffee reaches its optimal brew. Remember, leaving it too long can result in over-extracted, bitter coffee.
Source Links
- Brew the perfect percolator coffee with just a few simple steps – grind the coffee, add it to the basket, and heat the water for a rich, flavorful cup – Step-by-Step Guide.
- The stainless steel percolator is a classic choice for making 1 cup of coffee or brewing enough for a crowd – just place your coffee pot on the stove and let it percolate.
- Camping enthusiasts love the enamel percolator for its durable design and ability to deliver a hot cup of coffee no matter where the adventure takes them.
- Upgrade your morning brew with an electric percolator that does the work for you – simply add coffee grounds and water, then let the device percolate coffee to perfection.
- Never worry about grounds in the coffee with a percolator that features a specialized filter to prevent sediment from reaching your cup.
- The 10 Best Ways to Make Coffee While Camping
- The right coffee pot can make all the difference – choose a stainless steel coffee pot with water level markings to ensure you get the fresh coffee grounds ratio perfect every time.
- Enjoy the rich, robust flavor of coffee bean oil extracted through the percolate coffee process – the ideal choice for coffee connoisseurs and casual sippers alike.
- Designed for use in both the kitchen and on the many camping trips, the gsi glacier percolator is a versatile option that brews a delicious hot cup of coffee with ease.
- Let the coffee to settle before pouring for a smooth, sediment-free hot cup of coffee – the key to perfecting your percolator coffee routine.
- With its hole in the middle and designed for use over an open flame, the coleman 12-cup stainless steel percolator is a must-have for need to build a fire coffee lovers
- The classic percolator coffee pot is the go-to choice for coffee lovers who appreciate the rich, full-bodied flavor that comes from coffee to percolate through the grounds
- Ensure a flawless brew every time by carefully measuring the coffee grounds into the basket, then letting the water work its magic as it percolates through
- From classic stove-top models to modern coffee brewing devices, there’s a percolator coffee pot to suit every kitchen and brewing style
- The coffee basket is the heart of the percolator, allowing the water to evenly saturate the coffee grounds for maximum flavor extraction
- The quality gsi outdoors enamelware percolator features a specialized filter that prevents grounds from getting into your mug for a clean, smooth cup of coffee every time.
- Enjoy the convenience of pre-measured tablespoon per cup ratios by using a dedicated percolator basket with coffee, taking the guesswork out of your morning brew.
- Enjoy a rich, flavorful cup of coffee without any unwanted bitterness or sediment by carefully monitoring the percolation process.
- Look for a well-designed percolator with a secure lid and fine mesh filter to prevent any precious coffee grounds from fall through the holes during the brewing process.
- Mastering the art of percolator coffee requires a bit of practice and attention, but the payoff is a truly exceptional cup that’s worth the extra effort.
- Remember to close the lid on your percolator to lock in the rich aroma and flavor as the coffee brews, ensuring a consistently great cup every time.
- For outdoor enthusiasts, a percolator that can build a fire that’s hot enough to properly extract the coffee is a must-have for enjoying a fresh, robust brew no matter where you go.
- How to Make Coffee Using a Percolator
- How to make coffee with a camping percolator
Related Articles:
- Choosing the Right Cooler Size: What Size Cooler Do You Need for Camping?
- Best Camping Cooking Utensils for 2025 | Essential Camp Utensil Gear
- Essential Campfire Cooking Equipment for Your Ultimate Camp Kitchen
- The Best Camp Stove Accessories of 2025: Best Stove Gear Reviews
- Coleman PerfectFlow 2-Burner Camp Stove & Grill Review
Our Partners: CSKDesignCrafts.com – FitFusioHub.com – DesignersReport.com
This post contains affiliate links, which means I may earn a commission if you make a purchase through these links. There is no additional charge to you! Thank you for supporting my blog so I can continue creating free content each week!